

Commercial Ice Maker Troubleshooting for Los Angeles Restaurants
When you're troubleshooting a commercial ice maker, the problem is often simpler than you think. Before you dive into complex diagnostics, always start with the basics: power and water supply. For most restaurants in Los Angeles, the two biggest showstoppers are usually clogged water filters or just the sheer ambient heat of a busy kitchen, either of which can bring ice production to a grinding halt. A quick check can save you from a complete meltdown during a packed dinner rush.
Why Your Ice Machine Is a Critical Asset
Imagine this: it's a sweltering Saturday night at your Koreatown BBQ spot. The grills are fired up, the place is packed, and servers are running. Then, the bad news hits—the ice bin is totally empty. The machine hasn't just slowed down; it's stopped making ice altogether. This isn't a minor hiccup. It’s a genuine threat to your service quality and your bottom line. The same disaster could hit a Japanese sushi bar that needs fresh ice for its displays or a popular Thai Town joint famous for its iced teas.
This is a scenario that plays out far too often for restaurant owners across Los Angeles. Whether you’re running a food truck in Silver Lake or a high-end Mexican restaurant in Beverly Hills, a working ice machine is completely non-negotiable. It’s just as vital as your commercial refrigerators and freezers. An unexpected breakdown means you're dealing with unhappy customers, subpar drinks, and the frantic stress of trying to find an emergency ice delivery service.
The Real Cost of an Equipment Failure
Beyond the immediate scramble, equipment failures hit your wallet hard. A single breakdown can easily cost a restaurant between $500 to $2,000 in lost sales and emergency repair bills. In a high-volume market like LA, the data is clear: clogged water filters are the most common cause of failure, accounting for a massive 60% of total production stops.
The good news? A little bit of prevention goes a long way. Simple preventive maintenance every six months can cut down on emergency service calls by 80%, turning potential disasters into manageable tune-ups.
For any LA restaurant, being proactive with troubleshooting is your best defense against lost profits. Learning to spot the early warning signs means you can fix a small issue before it becomes a weekend emergency that kills your entire beverage service.
Most major meltdowns don’t just happen out of the blue. They give you hints first, usually starting as small, fixable problems like:
- Ice production that’s just a little bit slower than usual.
- Cubes that are coming out cloudy, soft, or smaller than they should be.
- A new, unusual noise coming from the machine.
Learning to spot these symptoms is the first real step in troubleshooting your commercial ice maker. It gives you the confidence to figure out what's going on and decide if it's a quick fix or if it's time to call in the pros. If you find yourself up against a problem that's more than just a simple cleaning, it’s always best to get expert help right away. You can always contact our support team for guidance on authorized service.
Diagnosing Common Ice Maker Problems in Your Restaurant
When your ice maker gives you trouble, it's time to put on your detective hat. Instead of just guessing, the key is to look at the specific symptoms to figure out what's really going on. A smart, step-by-step approach to commercial ice maker troubleshooting can save you a ton of time—and keep you from paying for a service call over something you could have fixed in five minutes.
Think about it: your busy Japanese spot in Little Tokyo relies on crystal-clear, solid ice for those premium cocktails. One afternoon, the cubes come out cloudy and small. This isn’t just a visual problem; it points to a specific set of causes that are completely different from a machine that’s just stopped working altogether. Let's break down the most common issues you'll face and walk through how to diagnose them like a pro.
When your machine is down, running through a quick mental checklist helps you figure out if it’s an easy fix or time to call in the experts.
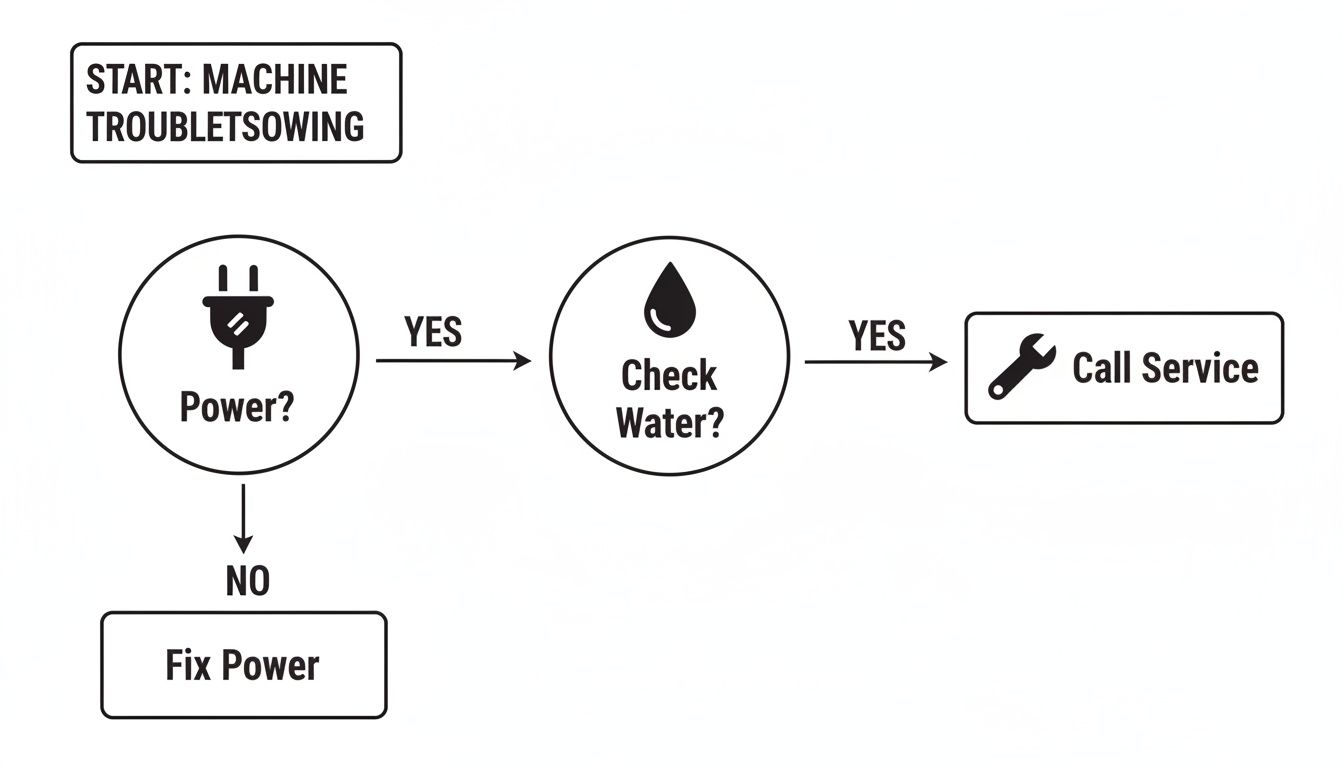
This flowchart nails the first two questions you should always ask: is it getting power, and is it getting water? Answering these before assuming the worst can save you from a needless service visit.
For our busy restaurant partners across Los Angeles, we've put together a quick-reference table to help managers run through the basics before picking up the phone. It’s a great first line of defense.
Quick Troubleshooting Checklist for LA Restaurants
| Symptom | Potential Cause | Quick Check / First Step |
|---|---|---|
| No Ice at All | No power or no water | Check the plug and circuit breaker. Then, confirm the water valve is open. |
| Ice Production is Slow | High ambient temperature or dirty coils | Is it hot near the machine? Look for dust/grease on the back/side vents. |
| Small or Cloudy Ice | Clogged water filter or scale buildup | Check the date on your water filter. Look for white, chalky residue inside. |
| Leaking Water | Clogged drain line or damaged inlet valve | Inspect the drain pipe for blockages. Check hoses for cracks or loose fittings. |
| Strange Noises | Worn-out fan motor or failing compressor | Listen for grinding or squealing. Pinpoint where the sound is coming from. |
This checklist covers the most frequent issues we see. If these simple checks don't solve the problem, it’s a sign that something more serious is going on and it's time to call for professional service.
Symptom 1: The Machine Produces No Ice
Seeing an empty ice bin is probably the most stressful symptom, but don't panic just yet. The fix is often surprisingly simple.
First things first, check the power. Is the machine plugged in all the way? Did the circuit breaker trip? In a busy LA kitchen with a dozen appliances running, an overloaded circuit is a daily possibility.
Next up, the water supply. Make sure the water line is actually connected and the shut-off valve is turned all the way on—it’s easy for a staff member to knock it closed during nightly cleaning. You also need to eyeball the water filter. If it’s seriously clogged, water flow can slow to a trickle, which isn't enough for the machine to even start a cycle. This is a big one for Los Angeles food trucks where water quality can change from stop to stop.
If both power and water seem fine, the problem might be a little deeper, like a faulty water inlet valve. This little part controls water flow into the machine, and you can usually hear a faint click when it opens. If you hear nothing, that could be your culprit.
Symptom 2: The Ice Production Is Too Slow
So, the machine is making ice, but it just can't keep up with your Thai restaurant’s packed beverage station on a Saturday night. Slow production is a huge headache, and nine times out of ten, the problem is heat.
Commercial ice makers, especially the air-cooled models you see in most kitchens, need room to breathe. Their entire job is to pull heat out of the water, and if the air around them is already hot, they have to work incredibly hard to get the job done.
- Check Ambient Temperature: Is your ice machine squeezed in next to a fryer or a hot grill? The sweet spot for most machines is an ambient temperature of around 70°F. Efficiency plummets for every degree you go above that.
- Inspect Condenser Coils: The condenser is how the machine gets rid of all that heat it pulls out. Over time, its coils get covered in a blanket of kitchen grease, dust, and flour. A dirty condenser traps heat, forcing the compressor to run nonstop just to make one batch of ice.
A hot, cramped space is an ice machine's worst enemy. Just giving the unit six inches of clearance on all sides and cleaning the condenser coils regularly can make a world of difference in your ice output.
Of course, a failing thermostat or a tired compressor could also be slowing things down, but always start with the simple environmental checks first. They’re the easiest to fix and often have the biggest impact.
Symptom 3: The Ice Quality Is Poor
You look in the bin and the cubes are small, soft, cloudy, or even have a weird taste. This is a massive red flag pointing to water problems or issues with the freezing cycle. For any LA restaurant, from a Koreatown BBQ joint to a fine dining spot in Beverly Hills, bad ice reflects poorly on the entire experience.
Scale buildup is the #1 cause of reduced ice output and bad-looking cubes. The mineral deposits from Southern California's hard water build up on the evaporator plates, acting like an insulator. This prevents the water from freezing solid and evenly, giving you those thin, misshapen, cloudy results. A professional descaling can bring back 20-30% more ice per cycle, and we've found that regular professional maintenance can prevent up to 80% of emergency breakdowns. You can find more on this topic at industry resources like VA Commercial HVAC.
Here’s what to check when your ice quality drops:
- The Water Filter: An old or incorrect filter won't remove minerals and other gunk, leading directly to scale and cloudy, bad-tasting ice.
- The Evaporator Plate: Take a peek inside at the metal grid where the ice forms. Do you see a white, chalky film? That’s scale. If you see it, the machine is long overdue for a deep cleaning.
- Ice Thickness: Are the cubes too thin? Or maybe they're too thick and still hollow in the middle? This usually means the ice thickness probe is either dirty, out of alignment, or failing. That little sensor is what tells the machine when it's time to harvest the ice.
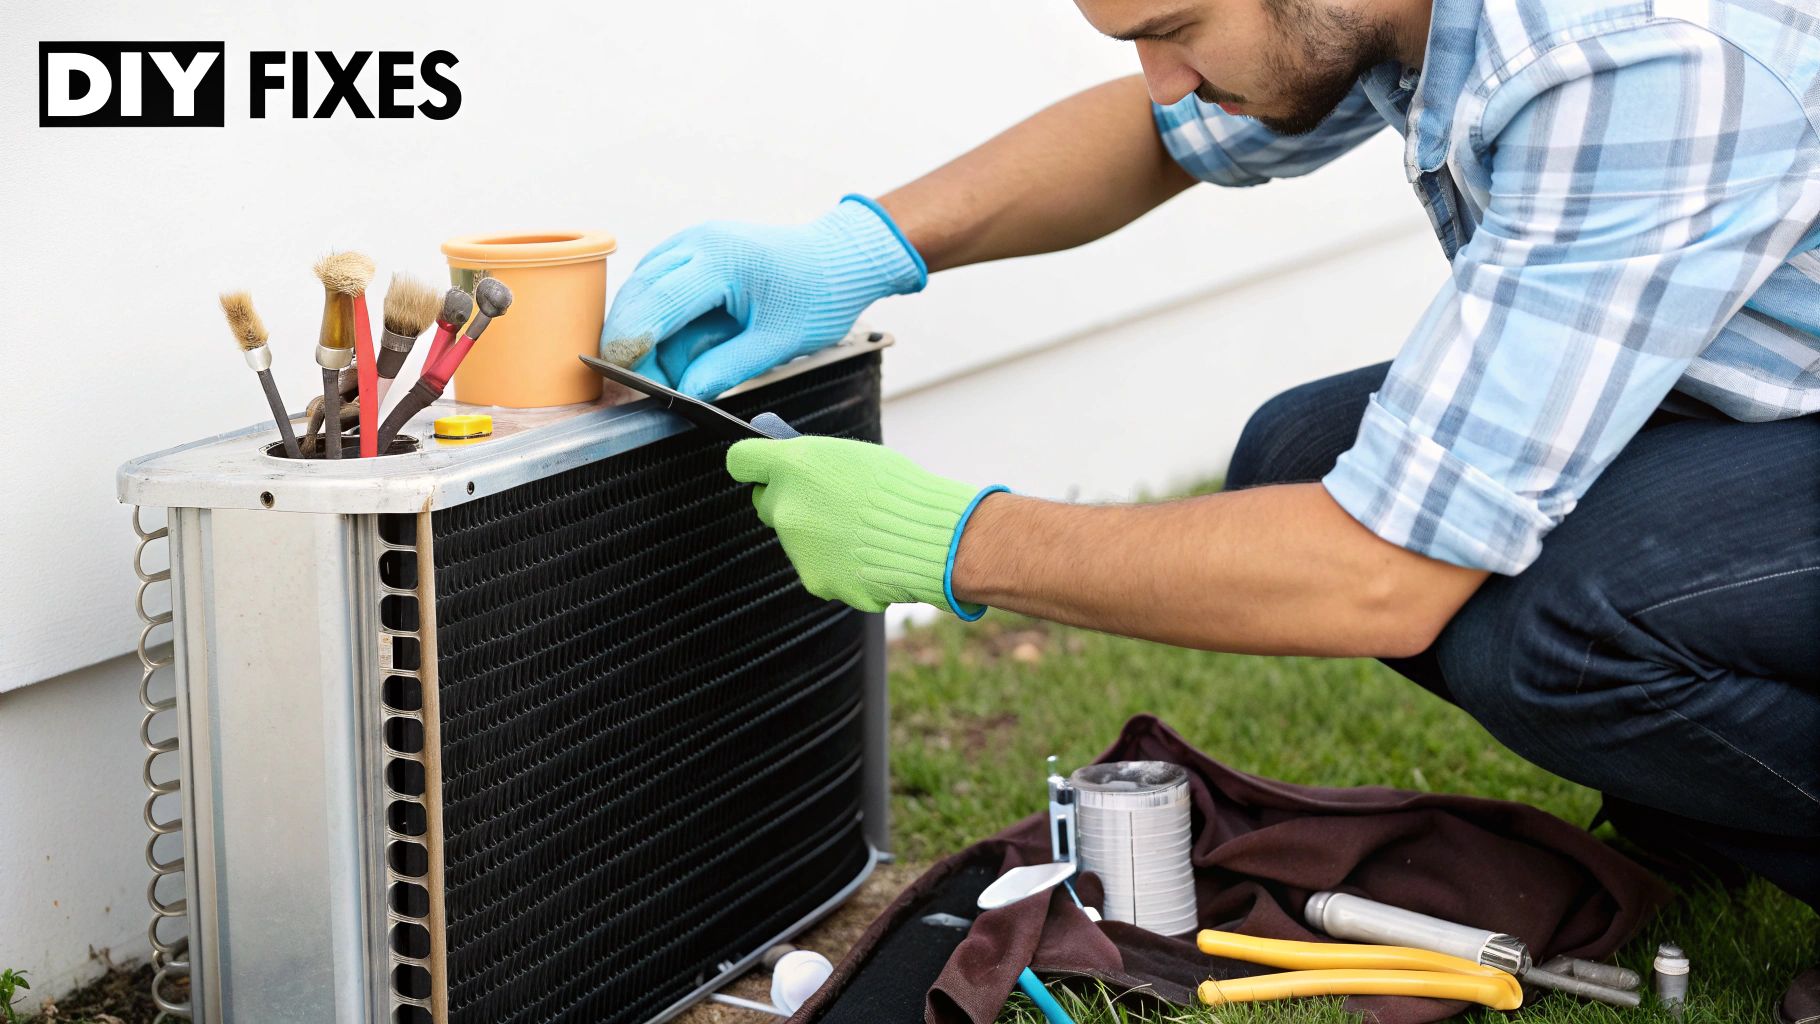
Practical Fixes You Can Perform Yourself
Once you've got a good idea of what’s ailing your ice maker, it's time to roll up your sleeves. The good news is, many of the most common problems don't require an expensive service call. With a bit of know-how and the right tools, you or your staff can tackle several key fixes, saving both time and money. That’s a crucial skill for any operator in Los Angeles, from a food truck in Venice to a bustling Chinese restaurant in the San Gabriel Valley.
We’ll walk through the most frequent DIY repairs, from cleaning condenser coils that have been baked by the SoCal heat to descaling a machine fighting LA's notoriously hard water. But before you touch a single screw, we have to talk about safety.
Safety First, Always
Before you even think about opening a panel, disconnect the ice machine from its power source. Unplug it or, better yet, shut off the breaker. This isn't optional—it's the only way to prevent a serious electrical shock. You'll also want to shut off the water supply to the unit to avoid any messy surprises.
Cleaning the Condenser Coils
A dirty condenser is probably the #1 reason for slow ice production and sky-high energy bills. In a busy kitchen, these coils are magnets for grease, dust, and everything else floating in the air, creating a thick blanket that traps heat. Cleaning them is a total game-changer for your machine's efficiency.
What You'll Need:
- A soft-bristled brush
- A stiffer brush for the tough stuff
- A shop vacuum with a brush attachment
- Commercial coil cleaner (optional, but great for heavy grease)
- Safety glasses and gloves
First, find the coils. They're usually behind a panel on the front, side, or back. With the power off, pop off that panel to reveal the radiator-like fins.
Start by gently brushing the coils with the soft brush to loosen all the surface dust. Be sure to brush with the fins, not against them, to avoid bending the delicate metal. Then, use your shop vac to suck up all the crud you just broke loose. If you're dealing with stubborn, caked-on grease, a commercial coil cleaner spray and the stiff brush will be your best friends. Just follow the directions on the can. A clean condenser lets your machine breathe again, boosting performance and taking a huge strain off the compressor.
Descaling the Water System
Southern California water is hard on restaurant equipment. Over time, mineral deposits like calcium and magnesium build up inside your machine, creating a chalky crust we call scale. This gunk clogs water lines, coats the evaporator plate, and is the reason you end up with cloudy, small, or just plain sad-looking ice. Regular descaling is non-negotiable.
What You'll Need:
- Manufacturer-approved descaling solution
- A clean bucket and a sponge
- Protective gloves and eyewear
Most modern ice makers have a "Clean" or "Wash" cycle to make this easy. Your owner’s manual will have the exact steps, but it usually involves pouring the right amount of descaling solution into the water trough or reservoir.
From there, you’ll start the cleaning cycle, which sends the solution through the whole system to dissolve all that mineral buildup. After the cycle finishes, it's critical to rinse everything thoroughly to get rid of any leftover chemicals. While you're at it, it’s a great time to give the inside of the storage bin a good scrub with a food-safe sanitizer.
Cleaning or Replacing Water Filters
A clogged water filter will kill your ice production without making a sound. It chokes the water flow down to a trickle, often causing the machine to shut down on a safety error. This is honestly one of the easiest and most effective troubleshooting steps you can take.
You should plan on replacing filters every six months, but if you're in an area with particularly bad water, you might need to do it more often.
- Find the filter: It's usually an external cartridge on the water line going into the machine.
- Shut off the water: Turn the valve before the filter to stop the flow.
- Release the pressure: If there's a red button on the filter housing, press it to relieve pressure.
- Swap it out: Twist off the old filter and screw the new one on. Make sure it's seated properly to avoid leaks.
- Turn the water back on: Open the valve slowly and check for any drips.
Pro tip: Use a marker to write the date on the new filter. It helps you remember when it was last changed amid the daily chaos.
Quick Adjustments: Ice Thickness and Drains
Sometimes the fix is just a simple tweak or clearing a minor blockage. These quick jobs can immediately improve your ice quality and prevent a watery mess on the floor.
Ice Thickness: If your cubes are coming out too thin or chunky, the ice thickness probe is the first place to look. This little sensor tells the machine when the ice is ready for harvest. More often than not, it's just covered in scale and needs a gentle wipe-down. If that doesn't do it, you can adjust it—usually with a small screw. A tiny turn clockwise generally makes ice thicker; counter-clockwise makes it thinner. Go slow and make small adjustments.
Clogged Drain: See a puddle around your machine? You've probably got a clogged drain line. Slime and debris can build up, causing water from the harvest cycle to back up and spill over. Disconnect the drain line and use a flexible pipe cleaner or a quick blast of compressed air to clear it out. Flushing the drain with a sanitizing solution every now and then will help keep it from happening again.
Doing these fixes yourself can save you a bundle and gives you the power to keep your operation running smoothly. But if you've tried these steps and you're still stuck, or if you suspect a bigger electrical or mechanical problem, it's time to pause. For those tougher jobs or if you're thinking it's time for an upgrade, checking out a new selection of commercial ice makers can show you what modern, more efficient models have to offer.
Smart Maintenance to Prevent Costly Downtime
Troubleshooting an ice maker after it breaks down is one thing, but preventing the failure in the first place is how savvy LA restaurant operators really save money. It's about shifting from a reactive panic to proactive care. This isn't about adding complicated chores to your day; it's about building simple, consistent habits that protect your investment and keep your business humming, whether you're serving Thai iced tea in Hollywood or margaritas in East LA.
A well-maintained machine doesn't just make better ice—it runs more efficiently, which helps cut down your utility bills. This approach also keeps you ahead of health inspections and helps you sidestep those awful weekend emergency repair bills that always seem to hit at the worst possible time. Consider this your playbook for keeping your kitchen’s unsung hero in peak condition.
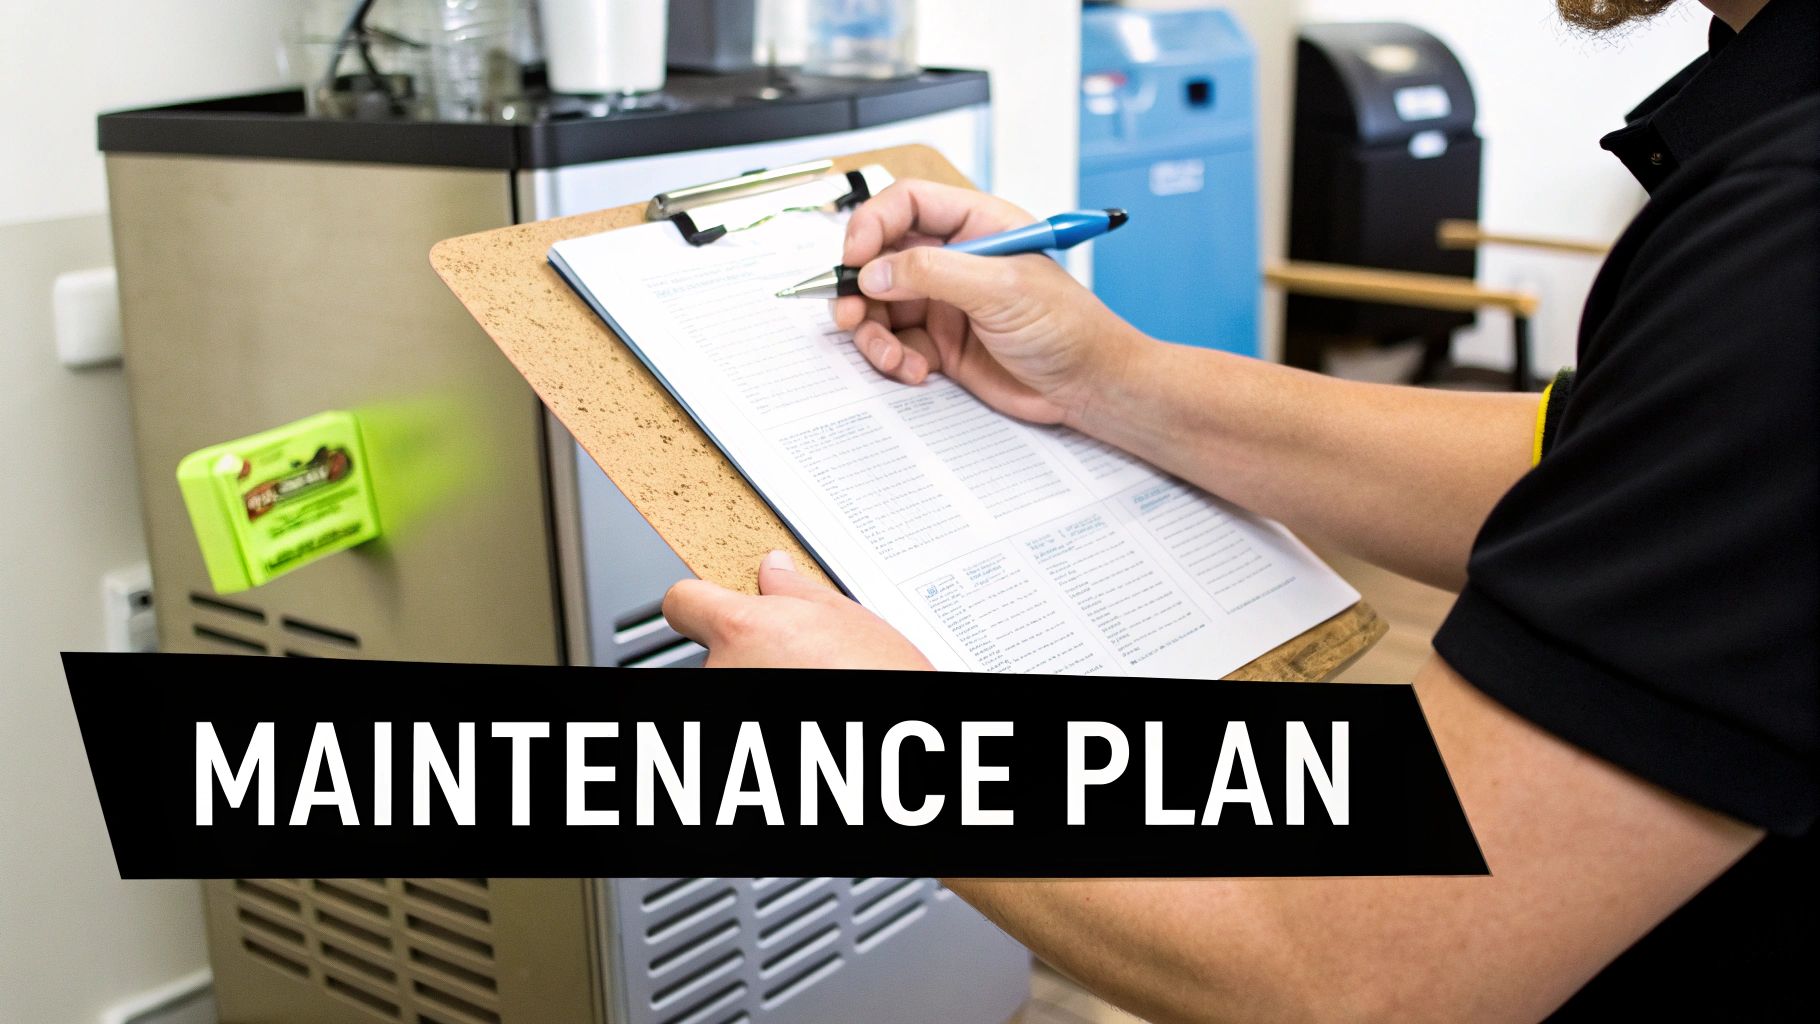
Building Your Maintenance Schedule
A little bit of attention really does go a long way. When you break down maintenance into daily, weekly, and semi-annual tasks, it’s much easier to work these checks into your team's existing routine. Consistency is what prevents the most common headaches like scale buildup and airflow restrictions.
Daily Habits (Less than 5 minutes)
- Wipe Down Exterior Surfaces: Use a food-safe cleaner to wipe down the machine’s exterior and the ice bin scoop. This keeps grime from building up and maintains a professional look.
- Check the Ice Bin: Just give the ice a quick visual inspection. Look for any signs of cloudiness or weird shapes, which can be an early warning that a problem is developing.
Weekly Tasks (10-15 minutes)
- Inspect and Clean Air Filters: If your air-cooled unit has a removable filter, pull it out and give it a good cleaning with warm water. A clear filter is critical for proper airflow to the condenser, especially in a hot kitchen.
- Check Water Filter Date: Take a quick look at the date on your water filter cartridge. If it’s getting close to its six-month mark, get a replacement scheduled.
For a busy Los Angeles food truck, where dust and heat are constant enemies, cleaning the air filter weekly isn't just a suggestion—it's essential for survival. A clogged filter can kill your ice production right in the middle of a lunch rush.
The Importance of Deep Cleaning
While those daily and weekly checks are vital, the biggest preventative steps happen twice a year. Scheduling a professional deep cleaning and descaling is the single best thing you can do to extend the life of your ice maker. These more intensive tasks tackle the internal problems that a simple wipe-down can't touch.
Semi-Annual Professional Service (Every 6 Months)
- Full Descaling and Sanitizing: A technician will run a full cleaning cycle with a nickel-safe descaling solution to dissolve all the mineral buildup from LA’s hard water. They’ll also sanitize the entire water system and storage bin to eliminate any potential for slime or bacteria.
- Condenser Coil Cleaning: You can do a light dusting, but a pro will use specialized tools to deep clean the condenser coils, which brings the machine’s cooling efficiency back to where it should be.
- Component Inspection: The technician will check all major parts—the compressor, fan motors, water inlet valve, and sensors—to spot any signs of wear and tear before they cause a full-on breakdown.
This smart maintenance mindset applies to your other crucial restaurant equipment, too. Just like you care for your ice maker, making sure you have the right energy-efficient commercial refrigerators can dramatically lower your overall operating costs. Proactive care across the board is a winning strategy for any modern restaurant.
Knowing When to Repair or Replace Your Ice Machine
Making the call between another pricey repair and just buying new restaurant equipment is a tough spot for any L.A. restaurant operator. Whether you’re running a high-volume Chinese spot in the SGV or a packed food truck, there's always a tipping point where sinking more cash into an old, unreliable ice machine stops making sense.
The trick is to have a simple financial rule to lean on.
A great place to start is the old industry guideline: the "50% rule." It’s a straightforward but powerful benchmark for this exact situation. If you get a repair quote that’s more than half the cost of a brand-new, comparable unit, it's almost always smarter to replace it.
This rule gets even clearer when you factor in the machine's age and how many times you've had to fix it already. If your ice maker is constantly on the fritz and service calls are becoming routine, those "smaller" bills are adding up fast and bleeding your maintenance budget dry.
Analyzing the Cost of Repairs
Let’s get real about what you might be facing. A minor fix, like swapping out a water inlet valve, is one thing. But when a major component gives out, that’s a completely different story. These are the repairs that can really sting.
Here are a few of the big-ticket repairs you might run into:
- Compressor Replacement: This is the heart of your ice machine. A new compressor can easily set you back $800 to $1,500 or more, once you include parts and the technician's time.
- Control Board Failure: As the machine's brain, a fried control board is a costly problem, often running anywhere from $500 to $1,000 to replace.
- Evaporator Plate Issues: If the evaporator plate is choked with scale or seriously damaged, the repair can be so extensive and expensive that it pushes you straight toward replacement anyway.
When a technician hands you an estimate for one of these jobs, it's time to pause and run the numbers. Put that quote side-by-side with the price of a new, dependable machine.
It's a simple financial truth: if repair costs exceed 50% of a new unit's price, replacement is often the best move, especially if the machine is past its typical 4-6 year lifespan. While average repairs hover around $400, a new, energy-efficient model can save you up to $303 annually in energy and water costs alone. Find out more about the financial breakdown of replacing your ice machine on burkett.com.
The Long-Term ROI of a New Ice Machine
Getting a new ice maker isn’t just about dodging one big repair bill. It’s about the long-term return on that investment. A modern, energy-efficient machine brings a lot to the table that an older unit just can't compete with. For a Korean BBQ joint already running multiple commercial freezers and refrigerators, every dollar saved on utilities counts.
First off, think about the lower utility bills. New models are engineered to be smarter with electricity and water, which means direct, measurable savings on your monthly statements.
Then there's the peace of mind that comes with a solid warranty. Many modern ice makers come with a two-year parts and labor warranty plus an impressive five-year warranty on the compressor. That kind of coverage means you won't be blindsided by unexpected repair costs for years, protecting your cash flow and cutting down on operational stress.
And finally, you get the priceless benefit of sheer reliability. Knowing your ice machine will keep up with demand during the Saturday night dinner rush lets you focus on what actually matters—serving incredible food and keeping your customers happy.
We Get These Questions All The Time
We've walked through the A-to-Z of troubleshooting ice makers, but certain questions always come up from busy restaurant owners here in Los Angeles. Let's tackle the ones we hear most often to give you that extra edge in keeping your kitchen running smoothly.
How Often Does My Ice Machine Really Need Professional Service in LA?
For most restaurants in Los Angeles, especially with Southern California's notoriously hard water, getting a professional service every six months is the way to go. It’s the perfect schedule to stop that scale buildup that chokes production and eventually leads to an expensive breakdown.
But, if you're running a high-volume spot—say, a packed Mexican restaurant slinging margaritas all night or a busy cocktail bar—you should seriously consider a quarterly service. That extra deep clean and descaling is a smart investment. It guarantees your machine is sanitary and performing flawlessly when you need it most.
My Ice Maker Is Still Under Warranty. Can I Just Fix It Myself?
In a word: no. If your machine is still covered by its warranty, trying to fix anything beyond basic cleaning is a really bad idea. You’re almost guaranteed to void the entire warranty, which could leave you paying out of pocket for a much bigger repair down the road.
If a motor or a sensor is on the fritz, your first and only move should be calling an authorized service technician. They'll get the job done right, and more importantly, your valuable warranty stays intact.
Trying to repair an in-warranty unit yourself is a costly mistake. Always go through an authorized pro to protect your investment and make sure the job is done correctly.
Where’s the Best Place to Put My Commercial Ice Maker in the Kitchen?
The location of your ice maker has a huge impact on how well it runs and how long it lasts. The single biggest mistake we see in LA kitchens is shoving the unit into a hot, cramped corner right next to the commercial range or deep fryer.
Your ice machine needs to breathe. The sweet spot is a well-ventilated area with at least 6 inches of clearance on all sides and the top. This space lets the condenser fan pull in cool air and expel hot air, keeping the compressor from working overtime just to keep things cold. Think of it like giving your hardest-working employee a little breathing room—they’ll perform much better for it.
When the troubleshooting points to a bigger issue, or it's simply time for an upgrade, Los Angeles Restaurant Equipment has the reliable, high-performance commercial ice makers your business depends on. Explore our selection and find the perfect fit for your kitchen today.