

How to Care for Butcher Block Countertops in a Commercial Kitchen
To get the most out of your butcher block countertops, you need a solid game plan. This means daily cleaning, regular oiling, and jumping on spills the second they happen. A little proactive care goes a long way in preventing drying, staining, and bacteria, making sure your wood surface is always ready for the demands of a commercial kitchen.
Your Prime Condition Maintenance Plan
Butcher block countertops bring a special warmth and functionality to Los Angeles kitchens. I’ve seen them everywhere, from high-volume Koreatown BBQ joints prepping mountains of galbi to small artisanal bakeries rolling out dough. But in a non-stop commercial environment, taking care of them is non-negotiable—both for looks and for health code compliance.
The constant hustle, the moisture from commercial refrigerators, and the sheer variety of ingredients in LA's food scene—think acidic citrus in a Mexican kitchen or vibrant sauces in a Thai spot—all put your countertops to the test.
This guide is your practical, no-nonsense checklist for protecting this critical kitchen asset. Mastering these simple, scheduled tasks will head off most common problems before they even begin. If you're outfitting a new space, understanding the full scope of equipment for a butcher shop goes hand-in-hand with knowing how to maintain these beautiful, functional surfaces.
The Commercial Kitchen Care Schedule
Consistency is everything. Whether you’re running a busy LA food truck or a bustling Chinese restaurant, a clear, repeatable process ensures nothing gets missed during a hectic service. This routine is designed to keep your wood surfaces sanitary, durable, and always ready for action.
To make things easy, here’s a quick-reference schedule that breaks down what to do and when. Think of this as your roadmap; we’ll dive into the specific techniques for each task in the sections ahead.
Butcher Block Care Schedule for Commercial Kitchens
| Task | Frequency | Primary Goal |
|---|---|---|
| Wipe & Sanitize | Daily (End of Shift) | Remove food debris and neutralize surface bacteria for health code compliance. |
| Oil & Condition | Monthly (or Weekly) | Hydrate wood to prevent drying, cracking, and moisture absorption. |
| Deep Clean & Deodorize | As Needed (Monthly) | Lift minor stains and eliminate absorbed odors from potent ingredients. |
| Inspect & Spot Treat | Weekly | Proactively identify and address small issues like stains or dry spots. |
| Resurface & Refinish | Annually or Biennially | Restore the surface by sanding away deep cuts and wear for a fresh start. |
Stick to this schedule, and you'll keep your butcher block in prime condition, protecting your investment and ensuring a safe, clean prep area for years to come.
Daily Cleaning and Sanitizing for Health Code Compliance
In the chaos of a busy Los Angeles restaurant, the end-of-shift cleanup is more than just a chore—it’s a non-negotiable ritual. A clean butcher block isn’t just for looks; it’s about keeping your customers safe and staying on the right side of the health inspector. Your daily routine needs to be fast, effective, and built for the unique needs of a wood surface.
It's easy to forget that wood is a porous, living material, completely different from stainless steel. Those harsh chemicals that make your commercial freezer door sparkle will wreck a butcher block, stripping its natural oils and leading to cracks where bacteria love to hide. You have to sanitize without causing that kind of damage.
The End-of-Shift Workflow
Picture a bustling taco spot in Downtown LA after a Friday night rush. The prep station is a mess of lime juice, cilantro, and tomato bits. All that acid can eat away at the wood’s finish if you let it sit, so your cleaning process has to be on point.
Keep it simple: a two-part system that cleans first, then sanitizes.
- Initial Cleaning: Grab a bench scraper and get all the loose debris off. Next, use a soft cloth or sponge with warm water and a tiny bit of mild, unscented dish soap. The trick is to use as little water as possible and never let it pool, especially if your block is near a sink.
- Thorough Drying: As soon as you’re done washing, dry the entire surface with a clean, dry towel. This is the single most crucial step. Water is the enemy of a healthy butcher block.
A common mistake I see in commercial kitchens is leaving damp towels or equipment on the wood overnight. This traps moisture and can lead to dark, moldy stains that are incredibly difficult to remove. Make it a house rule: nothing wet stays on the wood.
This quick routine gets rid of the physical grime and preps the surface for a proper sanitizing.
Food-Safe Sanitizing Methods
With the block clean and dry, it's time to sanitize. Forget bleach or any other aggressive cleaners—they're completely off the table for wood. Instead, you need food-safe solutions that work with the material.
A simple vinegar solution is both highly effective and health-code compliant. Just mix equal parts white vinegar and water in a spray bottle. Lightly mist the surface, let it sit for a few minutes to kill off bacteria, and then wipe it completely dry with a fresh, clean towel. Don't worry, the vinegar smell disappears as it dries.
For tougher jobs, like after you’ve prepped a mountain of garlic, a paste made from baking soda and water can lift minor stains and get rid of odors. Apply the paste, let it sit for a moment, give it a gentle scrub with a soft brush, then wipe it clean and dry it off. It’s way gentler than the abrasive powders you might use on other surfaces.
Integrating Care Across Your Kitchen
This mindset of using the right tool for the job extends beyond your butcher block. Just like wood needs specific care, so do other pieces of restaurant equipment. For example, knowing the right way to clean your stainless steel prep tables and commercial refrigerators is just as important for running a professional, sanitary kitchen. Using the right products helps all your expensive equipment last longer.
By locking in this daily routine for your butcher block, you create a system that protects your investment, keeps you ready for any surprise health inspection, and gives your team a safe, reliable surface to work on. It’s a small investment of time that pays off big in the long run.
The Essential Guide to Oiling and Conditioning Your Wood

While daily cleaning is your frontline defense, regular oiling is the most important long-term maintenance you can do for your butcher block. Think of it this way: cleaning handles the surface threats, but oiling replenishes the wood's health from the inside out. It’s what keeps the wood hydrated, resilient, and non-porous.
In a high-turnover kitchen, a well-oiled surface is your best friend. It naturally resists absorbing moisture, food odors, and bacteria. Here in Los Angeles, when those dry Santa Ana winds kick up and suck the moisture out of everything, this step becomes non-negotiable. A dry butcher block is a thirsty one—it will soak up anything it touches, which is a fast track to stains, warping, and cracks.
Why Food-Grade Mineral Oil Is the Industry Standard
When you’re choosing an oil, you need something simple and safe. The right oil penetrates deep into the wood without going rancid or leaving behind weird flavors. That’s why food-grade mineral oil is the undisputed champion in commercial kitchens. It's totally non-toxic, flavorless, and won’t spoil like cooking oils (olive or vegetable oil are big no-nos).
If it doesn't say "food-safe" on the label, don't even think about it. Mineral oil’s job is to saturate the wood fibers, creating a barrier that literally pushes water and other liquids out. This isn't just a suggestion; it’s fundamental to keeping your countertops in working condition.
The Oiling Process, Step by Step
Scheduling this is half the battle. The absolute best time to oil your countertops is at the end of service. This gives the oil all night to soak in without getting in the way of prep, maximizing absorption so the surface is ready for the next day's grind.
Here’s a practical, no-fuss approach:
- Start with a Clean Slate: Make sure the countertop is completely clean and, most importantly, bone dry. If you trap any moisture under the oil, you’re asking for serious problems down the road.
- Apply the Oil Liberally: Pour a generous amount of food-grade mineral oil right onto the surface. Don’t be shy; you want to see a visible layer across the entire block.
- Spread It Evenly: Grab a clean, lint-free cloth and spread the oil all over, always working in the direction of the wood grain. Give extra love to the high-traffic spots, like prep stations or areas near sinks, because they always dry out faster.
- Let It Soak: This is where the magic happens. Let the oil sit and penetrate for at least a few hours, but overnight is really the gold standard. You'll probably notice some spots drink up the oil almost instantly—those are the thirstiest areas and might need a second coat.
- Wipe Away the Excess: The next morning, take a fresh, dry cloth and buff the surface, wiping off any oil that hasn’t been absorbed. The wood shouldn’t feel greasy, just smooth and hydrated.
Here's a pro tip: You'll know your block is perfectly oiled when water beads up on the surface instead of soaking in. If you splash some water and it doesn't bead, you’re overdue for another oiling session.
Oiling Frequency and a Note on Conditioners
So, how often do you need to do this? It really depends on your kitchen's workload and local climate. Industry veterans and woodworkers all pretty much agree: for a frequently used surface, apply food-grade mineral oil at least once per month.
In drier climates or during a crazy busy season—like in a bustling Japanese restaurant—you might want to up that to every two to four weeks to keep the wood from drying out and checking. Mineral oil is a penetrant that evaporates over time with daily use, so this monthly routine is key to maintaining a protective barrier. You can find more great insights on proper butcher block care at hardwood-lumber.com.
You might also see butcher block conditioners on the shelf, which are usually a mix of mineral oil and natural waxes like beeswax or carnauba wax.
- Mineral Oil: Soaks in deep to hydrate the wood fibers from the inside out.
- Conditioner/Wax: Adds a protective, moisture-repellent barrier on top of the surface.
For a high-traffic commercial kitchen, think of oiling as the essential monthly hydration. Conditioning is more like an optional quarterly treatment for an extra layer of surface protection. It’s especially helpful for counters near commercial refrigerators and freezers where you get a lot of condensation.
Troubleshooting Stains and Moisture Damage
No matter how tight your kitchen crew runs the ship, spills and accidents are just part of the daily grind in a busy L.A. restaurant. A bottle of red wine gets knocked over during a hectic dinner rush, a container of gochujang springs a small leak, or a damp spot near the ice machine just won't go away. These things happen, and they can leave their mark on your butcher block.
This isn't about a full-blown refinishing project that shuts down your prep line. Think of this as your quick-response guide for damage control. We're talking about tackling everyday blemishes with food-safe methods that stop small problems from becoming major headaches, all without killing your kitchen's workflow.
Lifting Common Kitchen Stains
Different messes call for different solutions. If you’re running a Japanese spot dealing with constant soy sauce drips or a Thai kitchen where turmeric seems to get everywhere, a few simple tricks are a must. The most important thing is to act fast, using gentle, food-safe ingredients you’ve already got on hand.
- Dark Water Rings or Spots: These are probably the most frequent offenders, usually popping up around sinks and prep areas. To pull them out, sprinkle a good amount of coarse salt right on the stain. Grab half a lemon and use it to scrub the salt into the wood in a circular motion. The lemon’s mild acid and the salt’s grit work together to lift the discoloration. Let it sit for a few minutes, wipe it clean with a damp cloth, and dry it off immediately.
- Berry or Wine Stains: The vibrant colors in these stains can look pretty scary. Just whip up a thick paste with baking soda and a little water. Slap it on the stain, let it hang out for 10-15 minutes, then give it a gentle scrub with a soft brush. Wipe the paste away, clean the spot, and get it completely dry.
- Oily or Greasy Marks: When a greasy vinaigrette or some animal fat soaks in, your best friend is a simple degreasing soap. A dab of mild dish soap on a damp cloth will break down the oil. Just make sure to rinse the area thoroughly with a fresh, damp cloth and dry it completely before you even think about re-oiling.
Quick tip: The faster you get to a spill, the better your chances. A stain that’s been sitting for hours on dry wood is a whole different beast than one you wipe up right away.
When a Little Sanding is the Answer
Sometimes, a stubborn stain or a small burn mark from a hot pan just won't give up. For those tougher spots, a bit of localized sanding is the next move. You don't need to close the kitchen for this; it’s a quick, targeted fix.
Start with medium-grit sandpaper—180-grit is a great place to begin. Gently sand the spot, always moving with the grain of the wood. You're just trying to take off the thinnest top layer where the stain lives. Once the mark is gone, switch to a finer 220-grit sandpaper to smooth it out and blend it with the rest of the surface. Wipe away every bit of dust, clean the area, and then apply a fresh coat of food-grade mineral oil to seal and protect the newly exposed wood.
Getting Ahead of Moisture Problems
Honestly, the best way to deal with moisture damage is to make sure it never happens in the first place. Wood is a natural sponge; it sucks in moisture from the air and releases it, which can lead to warping or cracking. In a commercial kitchen with constant steam and splashes, this process goes into overdrive.
Wiping up spills right away, never letting water pool up, and using the right sanitizers are non-negotiable habits.
Here are a few proactive moves to make:
- Seal Around Sinks: Make sure any sink cutouts are sealed perfectly with waterproof silicone. Check it and re-caulk it once a year to keep water from sneaking into those vulnerable end grains.
- Use Equipment Mats: Stick rubber or silicone mats under coffee machines, ice bins, and any other gear that sweats. This creates a solid barrier between the condensation and your wood.
- Let It Breathe: Don't shove big appliances like commercial refrigerators or freezers right up against a butcher block backsplash. Leave a little gap for air to circulate so moisture doesn’t get trapped back there.
A Practical Guide to Sanding and Refinishing
After a few years of hard work in a high-volume kitchen—think a Thai noodle house in Hollywood or a bustling Koreatown food truck—daily wipe-downs just won't cut it anymore. You’ll start to see deep knife scores, stubborn burn marks, and the general wear that comes from prepping thousands of meals. That’s your cue for a full refinish. This isn’t just a cosmetic touch-up; it’s about stripping away the years and getting back to a like-new, sanitary surface.
Refinishing goes beyond looks. It’s a matter of food safety. Those deep grooves and gouges are perfect hiding spots for bacteria, making a smooth, properly sealed surface absolutely essential for passing health inspections and keeping your customers safe.
Deciding to Refinish DIY or Hire a Pro
So, the big question: do you tackle this yourself or call in a professional? For any busy Los Angeles restaurant, downtime is lost revenue, so this is a serious decision.
A DIY approach is definitely possible if the damage is just moderate and you can schedule the work during a planned closure. You get full control over the process and it can save you some money. But if your countertop has deep damage, serious warping, or your team just doesn't have the tools or time, hiring a pro woodworker is a smart move. They’ll guarantee a perfectly flat, flawlessly finished surface built to last.
Key Takeaway: If your kitchen can't be shut down for more than a day, or if you're dealing with deep burns or warping, calling a professional is almost always the faster, more reliable option. A botched DIY job can lead to even longer, more expensive downtime.
Assembling Your Refinishing Toolkit
Before you even think about starting, get your tools in order. A disorganized start just drags the whole project out.
- Orbital Sander: Don't even try this without one. It's the only way to get a consistently even, flat surface.
- Sandpaper Discs: You'll need a variety of grits. Start with a coarse 80-grit to strip the old finish and get rid of deep scratches. Then, move to a medium 120-grit or 150-grit for more smoothing, and wrap up with a fine 180-grit or 220-grit for that silky-smooth finish.
- Tack Cloths: Absolutely crucial for wiping away every speck of sawdust between sanding stages.
- Food-Grade Mineral Oil: Make sure you have a fresh, large bottle ready for re-seasoning.
- Clean, Lint-Free Cloths: You’ll need a good stack of these for applying oil and wiping off the excess.
- Safety Gear: A dust mask and safety glasses are non-negotiable. Wood dust is a serious lung irritant.
The Sanding and Refinishing Process
With your toolkit ready, it's time to bring that butcher block back to life. Be realistic with your timeline; this is not a quick task you can squeeze in at the end of a shift.
The infographic below shows the basic steps for handling stains, which is a big part of the refinishing game.
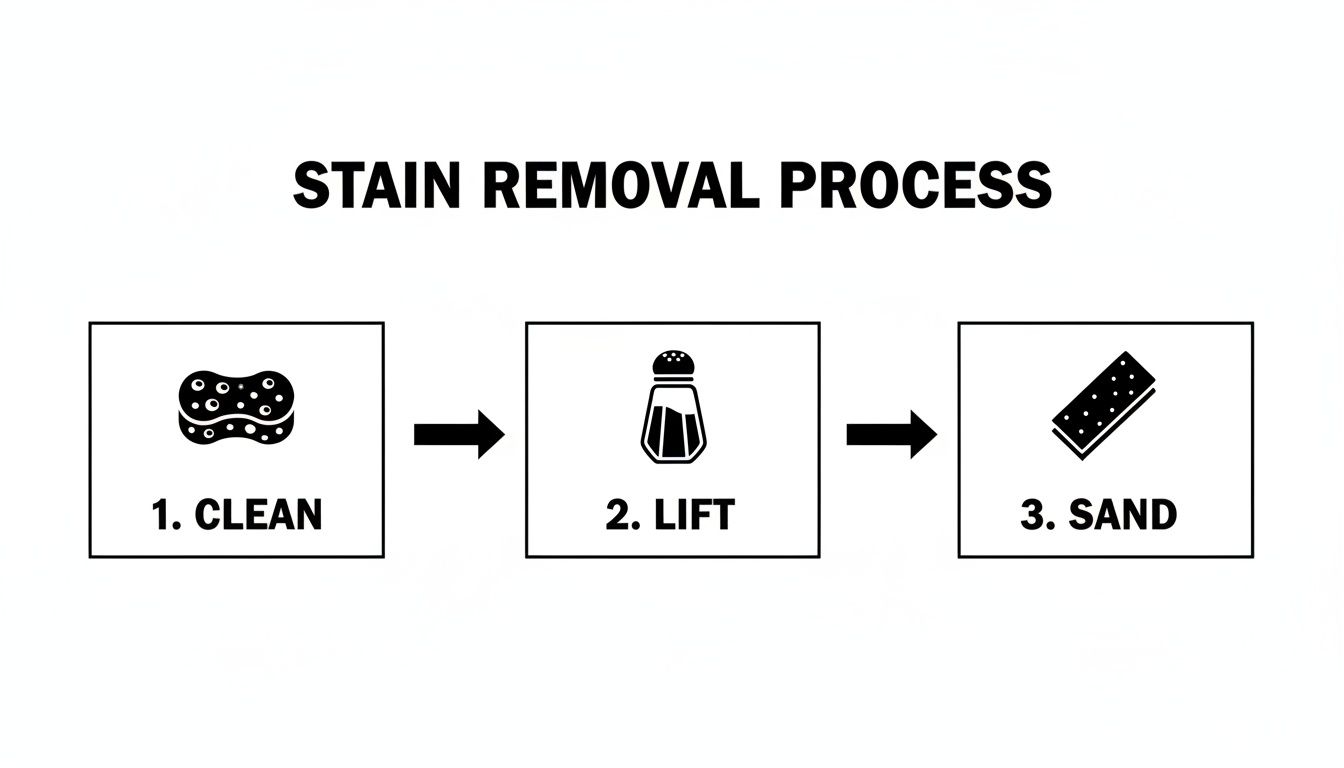
As you can see, a good restoration follows a clear path: clean, treat, and resurface the wood.
Fire up your orbital sander with the coarsest sandpaper (80-grit) and get to work. Move the sander slowly and evenly across the surface, always going with the grain of the wood. Your goal here is to remove that old, oil-soaked top layer and completely erase all the knife marks and stains.
Once you have a clean, raw wood surface, wipe away all the dust with a tack cloth. Now, switch to your medium-grit sandpaper (120 or 150-grit) and do it all again. This pass will smooth out the deeper scratches left by the coarse paper.
After another good cleaning with a fresh tack cloth, it's time for the final pass with your fine-grit sandpaper (180 or 220-grit). This is the magic step that creates a smooth, professional-grade surface ready for oil. When you're done, it should feel incredibly smooth to the touch.
Re-Oiling for a Protective Finish
Sanding is done, so the last step is to re-season the wood. It’s the same as your regular oiling routine, but a freshly sanded block is going to be incredibly thirsty.
Pour a very generous amount of food-grade mineral oil onto the clean, dust-free wood. Use a clean cloth to spread it evenly, making sure you hit every single inch. Now, let it soak in for at least 8-12 hours, though overnight is even better. You'll see the wood just drink up the oil. Keep applying more coats until the wood stops absorbing it, then simply wipe away any excess with a dry cloth.
The time commitment is pretty predictable. A light surface sanding with 180–220 grit and re-oiling can usually be done in under a day, which works for a short closure. But for more serious work on the full top with multiple coats of oil, you should plan for 1–3 days to do it right.
Common Questions About Butcher Block Care
Even with the best maintenance plan, some questions always come up, especially in the high-stakes environment of a commercial kitchen. From food trucks hustling across Los Angeles to packed Koreatown restaurants, chefs and owners need straight answers. We've gathered the most common ones we hear to help you handle your butcher block like a pro.
Can I Use Butcher Block in My LA Food Truck?
You absolutely can. Butcher block is a solid, resilient choice for a food truck, but you have to be even more on top of its care. The constant swings in temperature and humidity inside a truck—especially in the Los Angeles heat—mean that monthly oiling is non-negotiable. Skip it, and you’re asking for warping and cracking.
Also, make sure it’s installed with heavy-duty support to handle the vibrations from the road and the general chaos of service. Daily sanitizing is critical for hitting health codes in that tight space. Keep in mind that long days at sunny outdoor events can parch the wood much faster, so you might need to condition it more often to keep it from getting brittle.
What Is the Difference Between Oiling and Conditioning?
This one trips a lot of people up, but it’s actually pretty simple. Think of it this way: oiling is for hydrating, and conditioning is for protecting.
- Oiling: This is just pure, food-grade mineral oil. It soaks deep into the wood fibers to hydrate from the inside out. Its only job is to stop the wood from drying out and getting porous.
- Conditioning: This is a mix, usually mineral oil blended with a natural wax like beeswax or carnauba wax. The oil still does its hydrating job, but the wax adds a protective barrier on the surface to repel moisture.
In a busy commercial kitchen, consistent oiling is the most important thing you can do. Using a conditioner every couple of months, particularly around sinks or near commercial freezers, just gives you an extra layer of defense against spills and condensation.
A good way to think about it is skincare. Oiling is like a deep-absorbing moisturizer, while conditioning is like putting a protective balm over the top to lock in moisture and shield it from the elements.
How Do I Know if My Countertop Is Oiled or Sealed?
You have to know which finish you have because the care routines are completely different. The easiest way to find out is the water drop test.
Just put a few drops of water on the surface. If the water beads up and sits on top, you’ve got a sealed countertop, likely finished with polyurethane. If the water slowly sinks in and darkens the wood a bit, it’s a traditional oil finish. Everything in this guide is for oil-finished countertops—the kind you can prep food on directly. Never cut on a sealed countertop; you’ll just slice right through the plastic-like coating.
Is It Safe to Prep Raw Meat Directly on Butcher Block?
Even though a well-oiled butcher block has natural antimicrobial qualities, the professional answer for a commercial kitchen is a hard no. The risk of cross-contamination with raw meat, poultry, or fish is just too high.
Always, always use a separate, non-porous cutting board (like plastic or a composite) for high-risk foods. It’s a simple step that protects your customers, makes your sanitizing process foolproof, and keeps your beautiful butcher block in great shape for everything else—like chopping vegetables, portioning cheese, or kneading dough. If you're looking at different surfaces, our guide on stainless steel kitchen prep tables covers another industry-standard option.
For all your kitchen needs, from heavy-duty commercial refrigerators to the smallwares that keep your line moving, Los Angeles Restaurant Equipment is here to help you build a kitchen that works. Visit us at https://losangelesrestaurantequipment.com to find reliable restaurant equipment with free delivery and flexible financing.